一切的初始~~~
备注:图片图床使用为Github,打不开需要挂梯子!
原本呢,很长一段时间都没怎么写过博客了,很多东西都记录在语雀上了
本次重新搭建一个专门用于记录与CTF的故事,在这个上面只会发布比赛Writeup的部分分享~~
一方面也是语雀的服务器在体验上有些不如人意,连续几次在我专心写的时候,出现问题,qwq~~
顺便第一篇也分享一下我目前是如何使用一套全免费的自动化静态博客部署方案
目前使用的包括Siyuan+PicGo+Github actions
思源笔记
首先来看一下有关思源笔记的配置
所有的配置考虑长远,我的优先需求均为便于迁移
因此采用的是docker搭建,基础的docker环境不过多叙述
docker run -d \
  -v /Data/siyuan/workspace:/siyuan/workspace \
  -p 6806:6806 \
  -u 1000:1000 \
  b3log/siyuan \
  --workspace=/siyuan/workspace \
  --restart=always \
  --accessAuthCode=joker
chown 1000:1000 /Data/siyuan/workspace完成拉取和运行,再对工作目录赋予权限即可完成
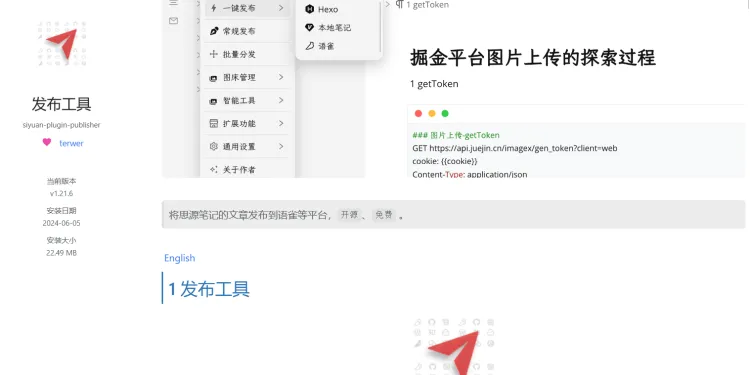
本次需要使用的两个插件为
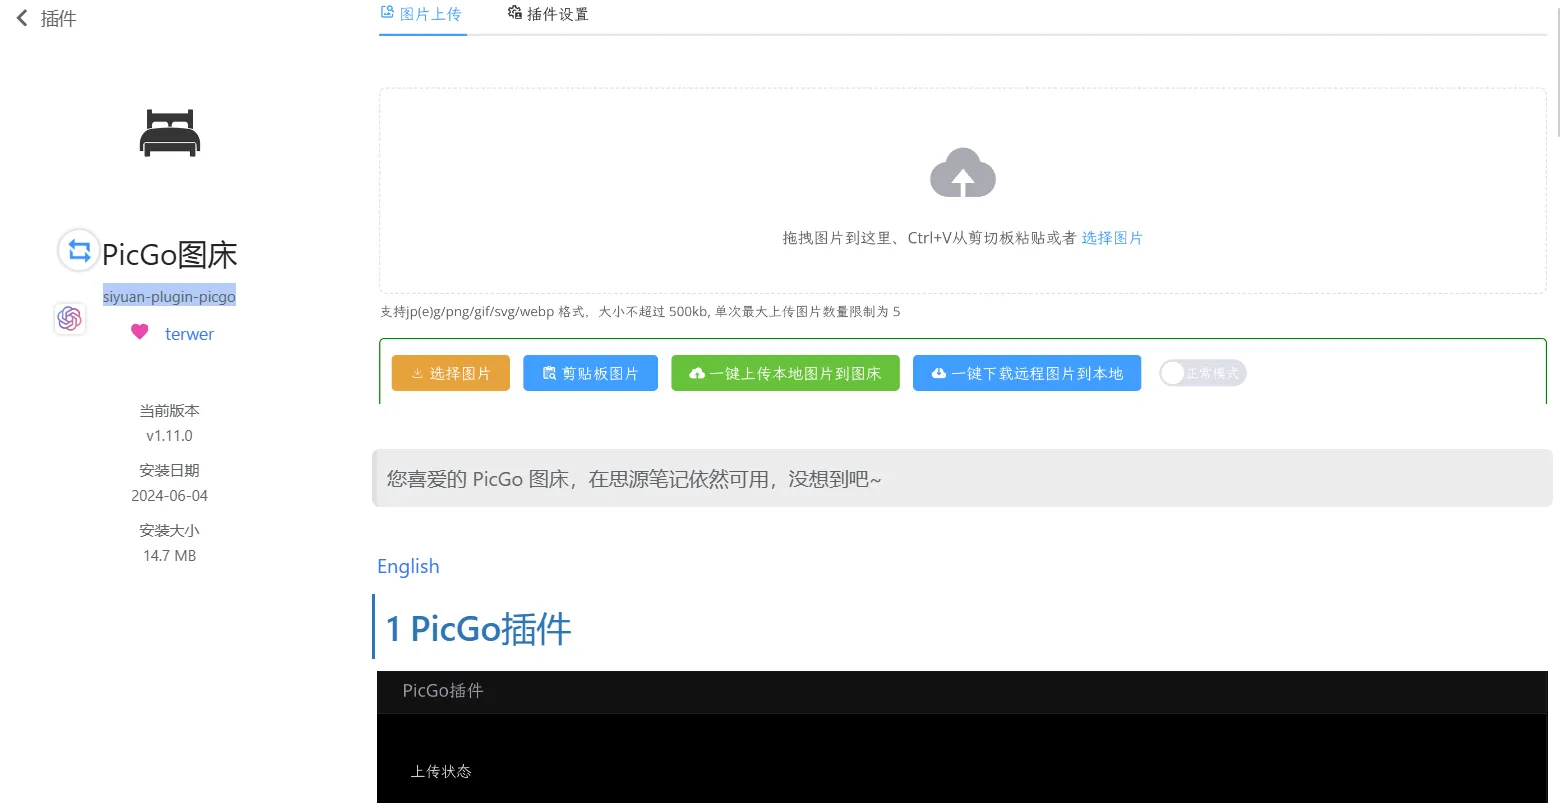
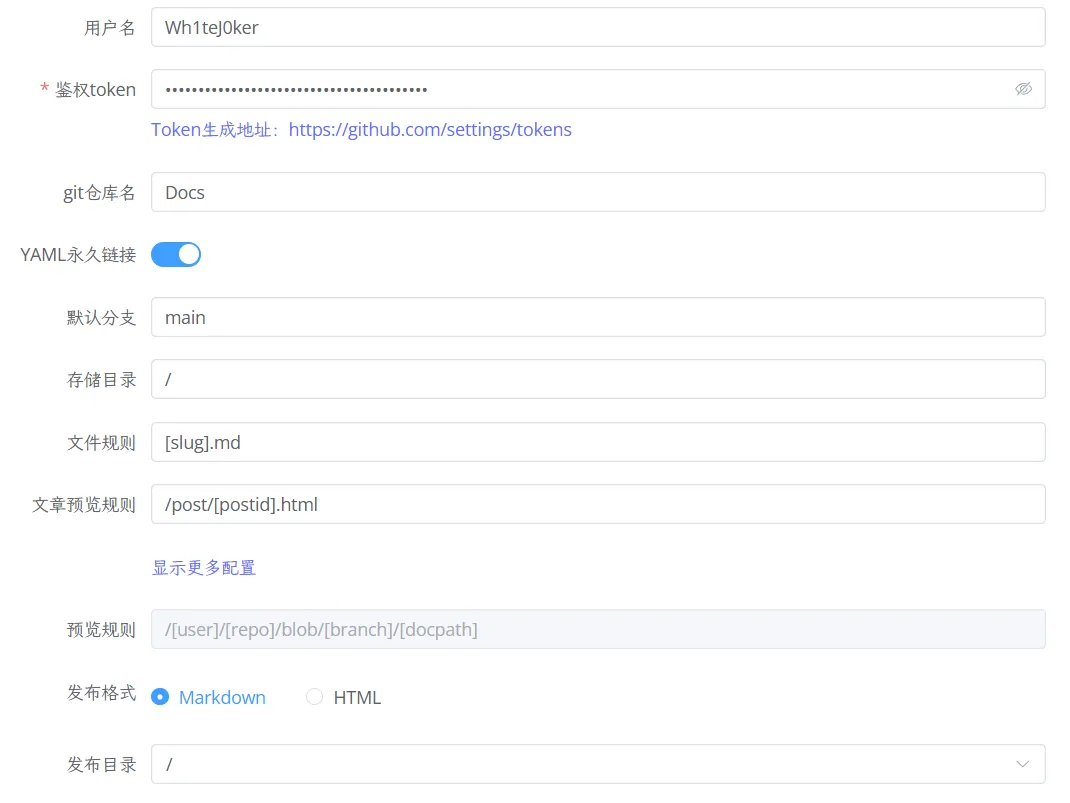
PicGo
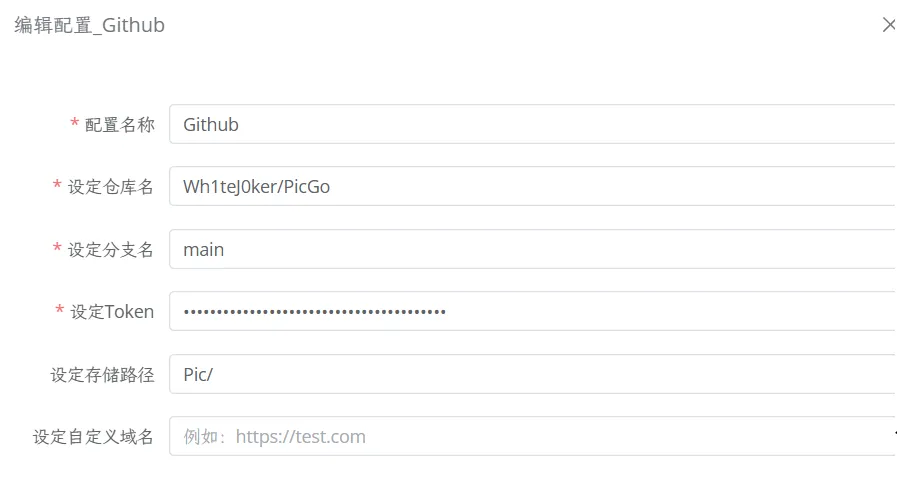
参考这张图,完成个人的仓库名,分支,以及Token设定
token生成如下:
Personal Access Tokens (Classic) (github.com)
完成设置后,可以上传图片测试是否成功
Publisher
《发布工具平台配置指南》 - 在线分享 (terwer.space)
首先由于我是docker进行的搭建,因此要完成偏好设置->思源设置
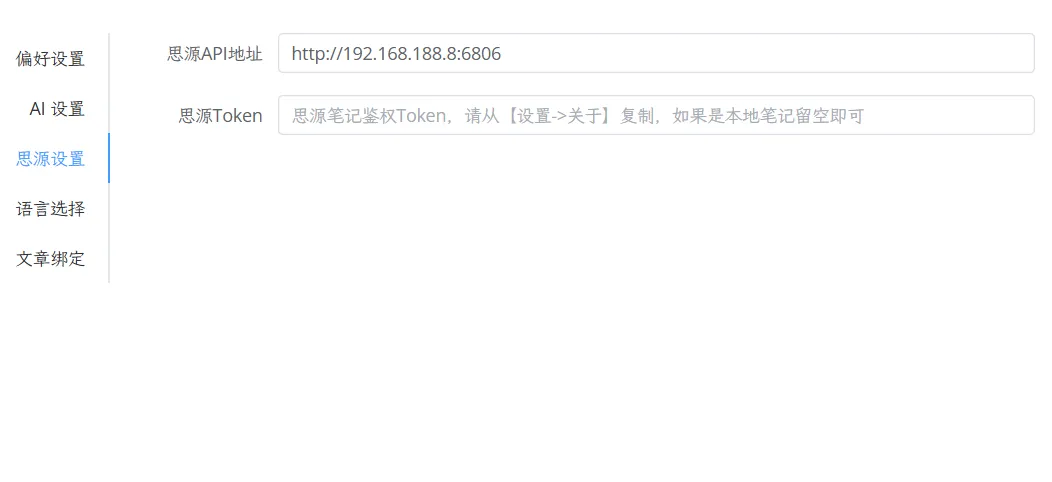
换成自己的访问IP
主要需要完成的设置就是鉴权Token
其余基本默认即可,完成后及时完成测试
Github Actions
到了最重要的完成自动化部署了
| https://github.com/Wh1teJ0ker/Blog | 存放markdown |
|---|---|
| https://github.com/Wh1teJ0ker/wh1tej0ker.github.io | 存放静态网页 |
Hexo基础部署
先做一个测试环境
docker run -it --name Blog \
  -p 250:8080 \
  -v "/Data/Blog/coder/.config:/home/coder/.config" \
  -v "/Data/Blog/project:/home/coder/project" \
  -u "$(id -u):$(id -g)" \
  -e "DOCKER_USER=coder" \
  -e PASSWORD='admin' \
  -d codercom/code-server:latest
安装nvm
cd /root
wget https://github.com/nvm-sh/nvm/archive/refs/tags/v0.38.0.tar.gz
mkdir -p /root/.nvm
tar -zxvf nvm-0.38.0.tar.gz -C /root/.nvm
vim ~/.bashrc
#####
export NVM_DIR="$HOME/.nvm/nvm-0.38.0"
[ -s "$NVM_DIR/nvm.sh" ] && \. "$NVM_DIR/nvm.sh"  # This loads nvm
[ -s "$NVM_DIR/bash_completion" ] && \. "$NVM_DIR/bash_completion"  # This loads nvm bash_completion
#####
source ~/.bashrc
切换npm
nvm install
nvm use
nvm ls
nvm uninstall
安装npm
#配置源
nvm node_mirror https://registry.npmmirror.com/node/
nvm npm_mirror https://registry.npmmirror.com/npm/
#版本选择
nvm install 16
# verifies the right Node.js version is in the environment
node -v # should print `v16.20.2`
# verifies the right npm version is in the environment
npm -v # should print `8.19.4`
#设置权限
npm config set user 0	设置用户权限
npm config set unsafe-perm true	设置权限
sudo chown -R $(whoami) ~/.npm
sudo chown -R $(whoami) ~/.nvm
安装hexo
#阿里源
npm config set registry https://npm.aliyun.com
#淘宝
npm config set registry https://registry.npmmirror.com
#原始
npm config set registry https://registry.npmjs.org/
npm install -g hexo-cli
npm install hexo-deployer-git --save
选择目录初始化操作
hexo init本次主题选用的极简风格
LenChou95/hexo-theme-ZenMind: 一款 Hexo 单栏简洁主题 A simple and elegant theme for hexo. (github.com)
deploy需要使用ssh
以上是正常的过程,将其放置于Blog仓库
Github Actions自动化部署
需要先使用生成密钥
ssh-keygen -f github-deploy-key
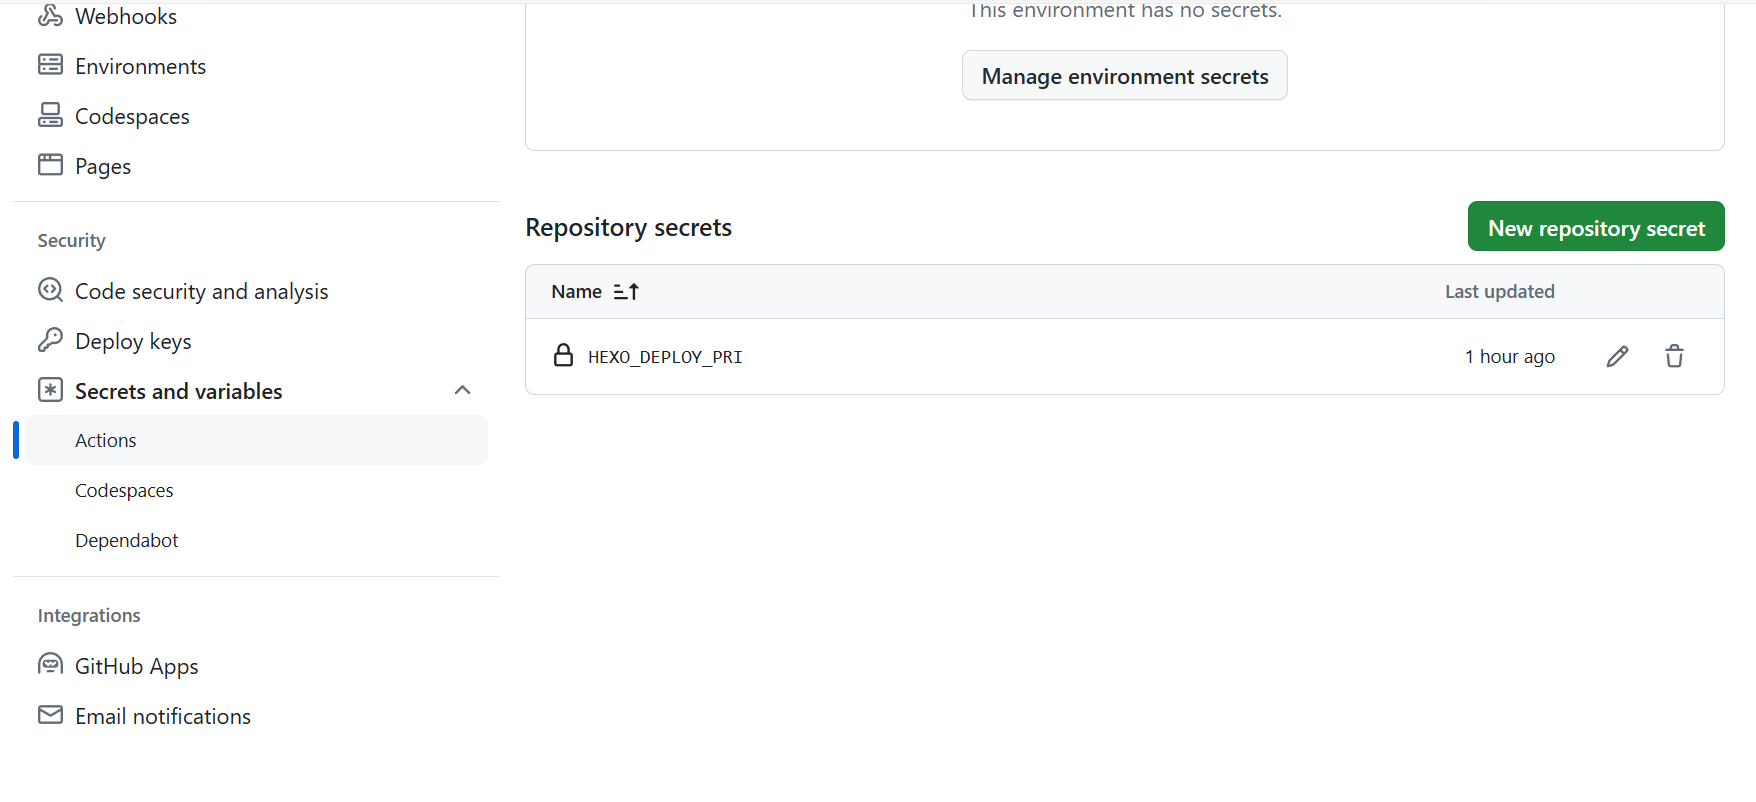
在我们第一个存放源码的仓库Blog中将github-deploy-key放入secret
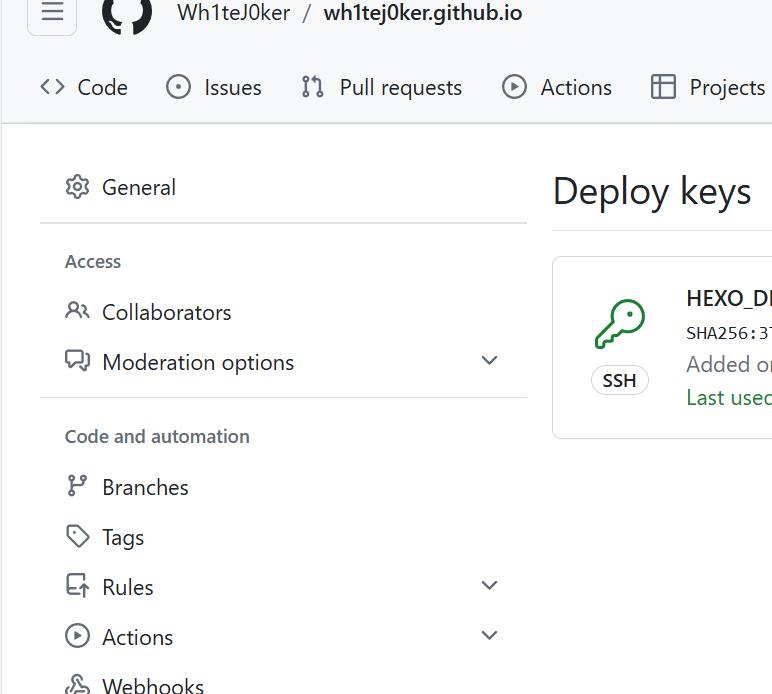
第二个github.io的仓库Deploy存放github-deploy-key.pub
完成上述之后,我们实际上为了完成两个仓库之间交互的第一步
接下来就是编写Actions脚本
Hexo + github actions 自動化部署 | Winnie's blog (op30132.github.io)
借鉴如上
name: HEXO CI

on:
  push:
    branches:
    - main

jobs:
  build:
    runs-on: ubuntu-latest
    strategy:
      matrix:
        node-version: [18.x]

    steps:
      - uses: actions/checkout@v2

      - name: Use Node.js ${{ matrix.node-version }}
        uses: actions/setup-node@v2
        with:
          node-version: ${{ matrix.node-version }}

      - name: Configuration environment
        env:
          HEXO_DEPLOY_PRI: ${{ secrets.HEXO_DEPLOY_PRI }}
        run: |
          mkdir -p ~/.ssh/
          echo "$HEXO_DEPLOY_PRI" | tr -d '\r' > ~/.ssh/id_rsa
          chmod 600 ~/.ssh/id_rsa
          ssh-keyscan github.com >> ~/.ssh/known_hosts
          git config --global user.name "Wh1teJ0ker"
          git config --global user.email "1430100306@qq.com"

      - name: Install dependencies
        run: |
          npm install -g hexo-cli
          npm install

      - name: Deploy hexo
        run: |
          hexo clean
          hexo g
          hexo d
如遇报错,需要查看日志进行debug
希望自己之后能记得更新吧~~!!
Comments